一、GeoServer安装和发布服务
二、PostgreSQL 和 PostGIS安装
PostGIS要下载和PostgreSQL对应版本!!!
1.下载安装postgreSQL
进入PostgreSQL 官网,进入下载导航,点击windows系统,或直接打开如下网址:
https://www.enterprisedb.com/downloads/postgres-postgresql-downloads
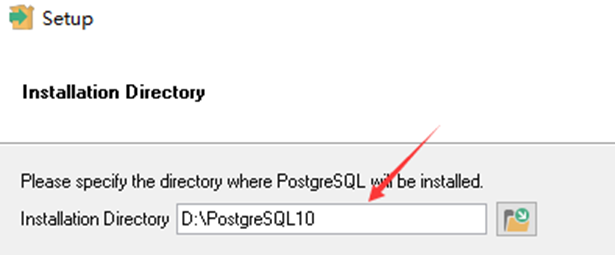
下载好后,以管理员身份运行安装包,然后指定安装路径
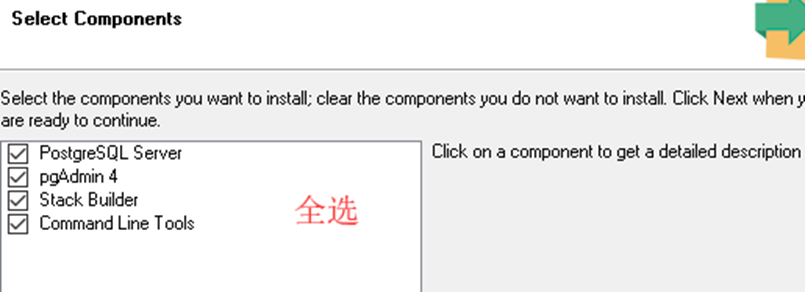
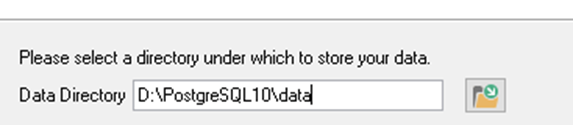
然后一路next

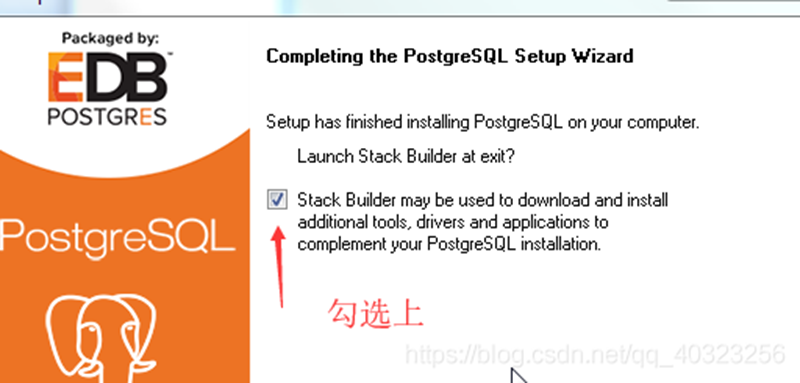
(注意:可能会报错,不过没关系,点击取消就行)
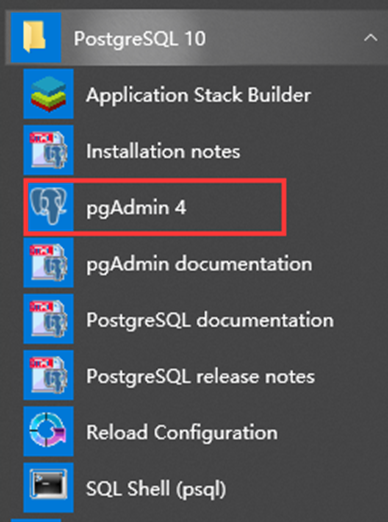
在程序里找到安装的PostgreSQL 10下面的pgAdmin4运行数据库管理工具
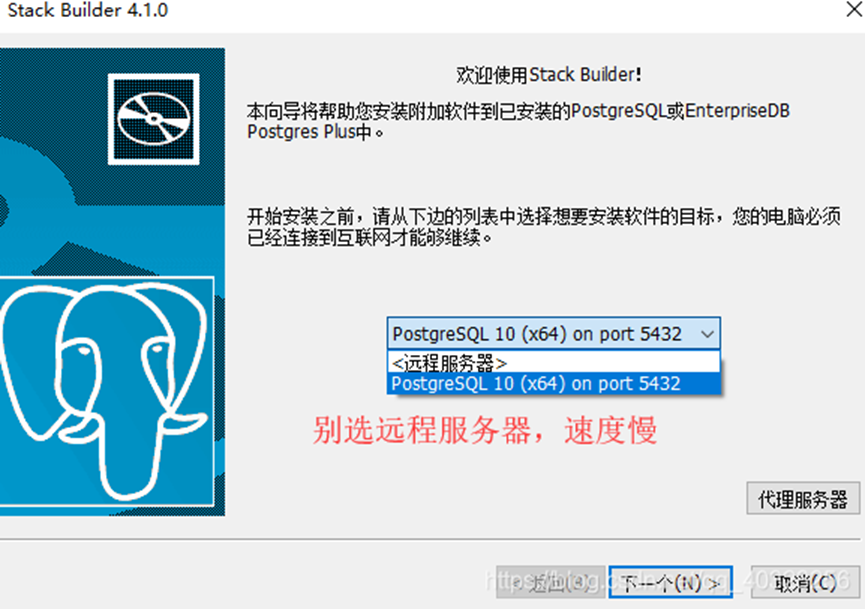
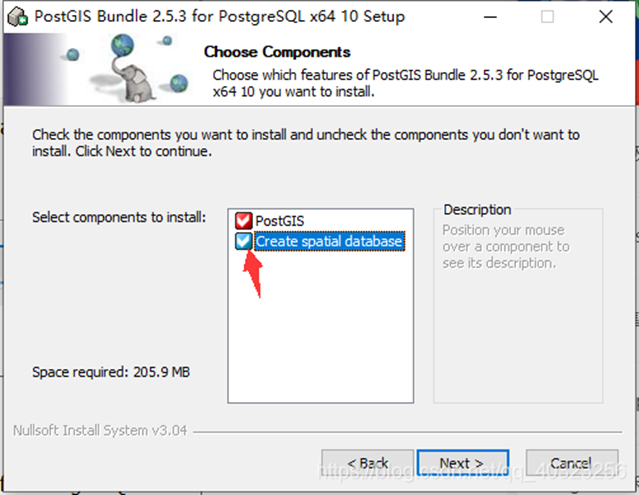
2.下载安装postgis
可使用Application Stack Builder进行下载,但速度比较慢,而且可能会卡死无响应,因此换一种可以直接下载.exe的方法。
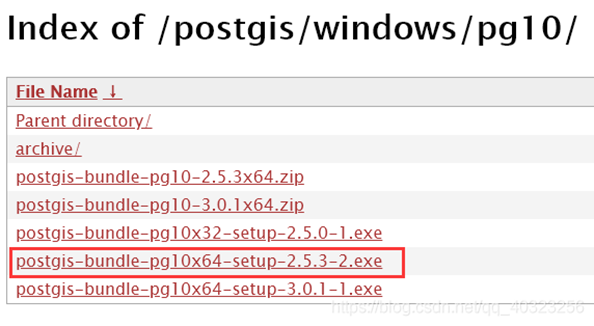
下载地址:http://download.osgeo.org/postgis/windows/
==一定一定要先选择对应的PostgreSQL版本!!!==

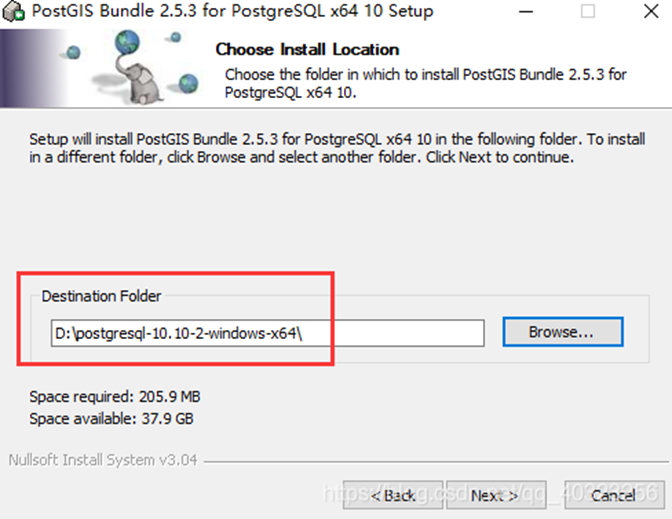
注意:上面的安装路径一定要选择postgresql的安装路径!!!切记
一路next
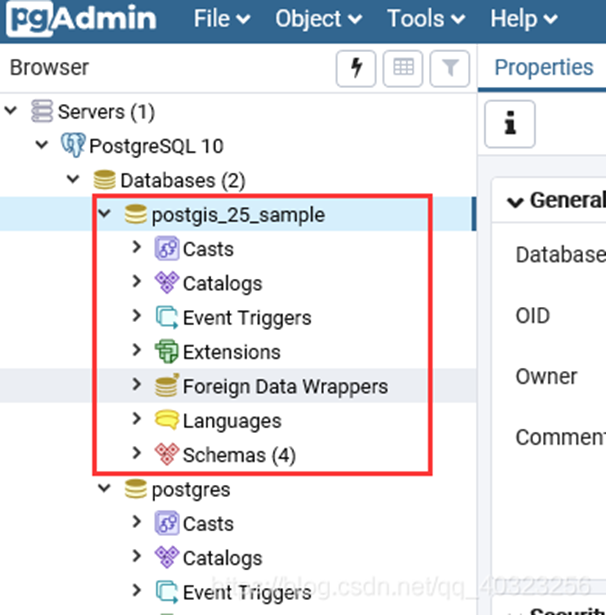
重新打开pgadmin,发现出现了postgis数据库了
三、创建空间数据库
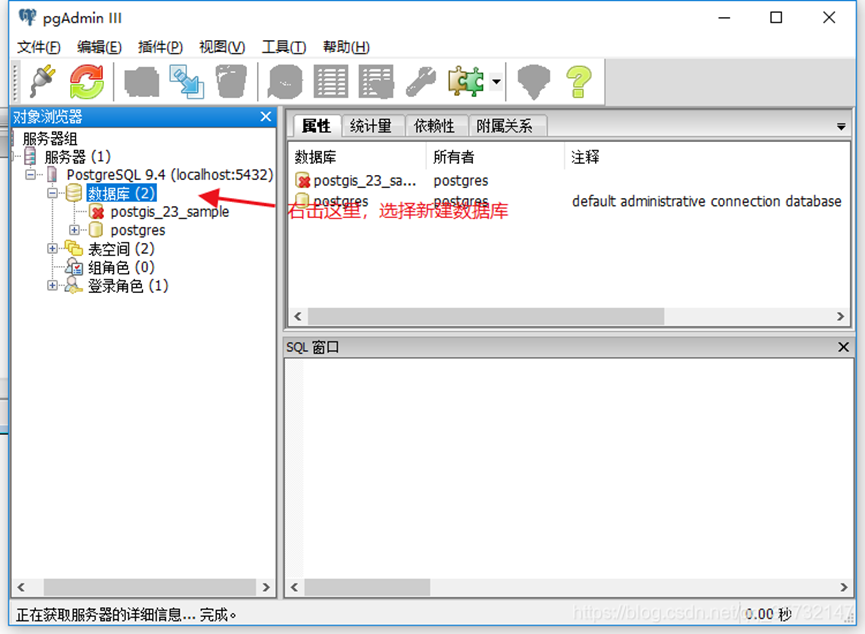
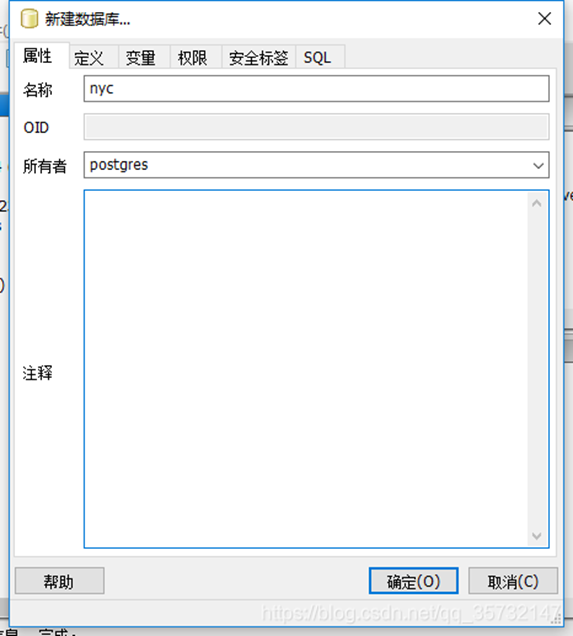
1.打开pgAdmin4,鼠标右击数据库选项并选择新建数据库:
2.如下图所示,填写“新建数据库”表单,然后单击“确定”:
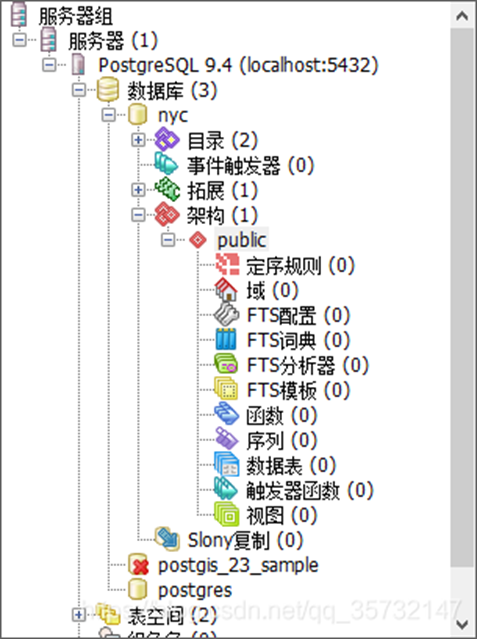
**3.**选择nyc这个新建的数据库,并打开它以显示对象树,将会看到public架构(schema):
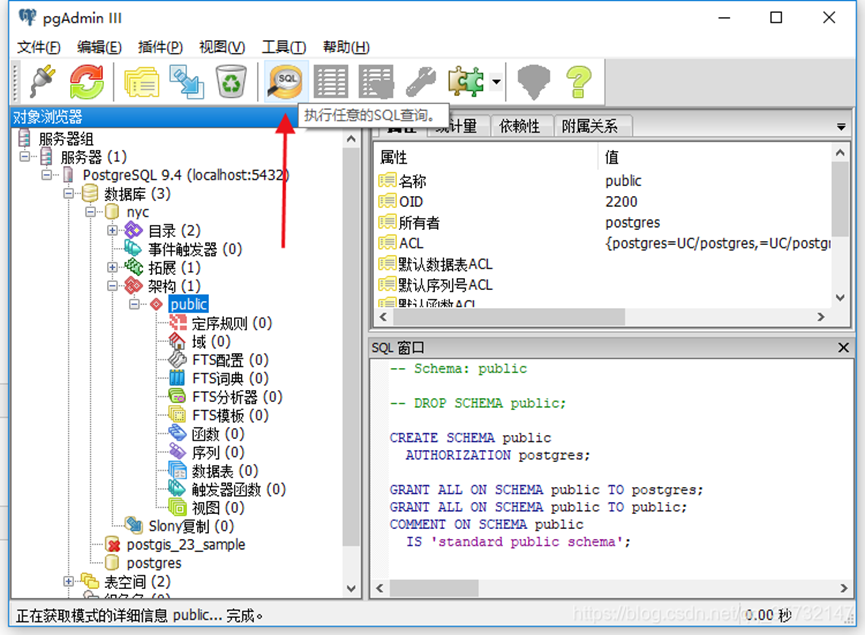
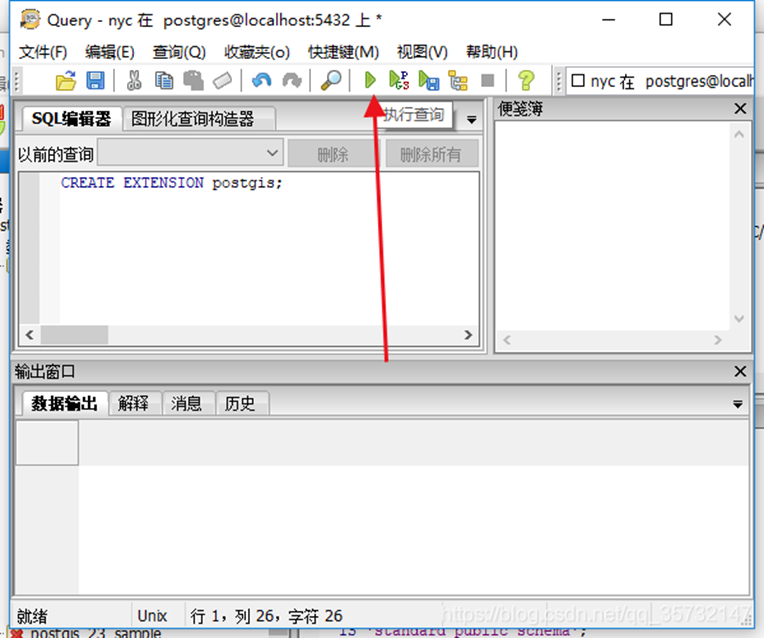
4. 单击下面所示的SQL查询按钮(或转到工具 > 查询工具)。
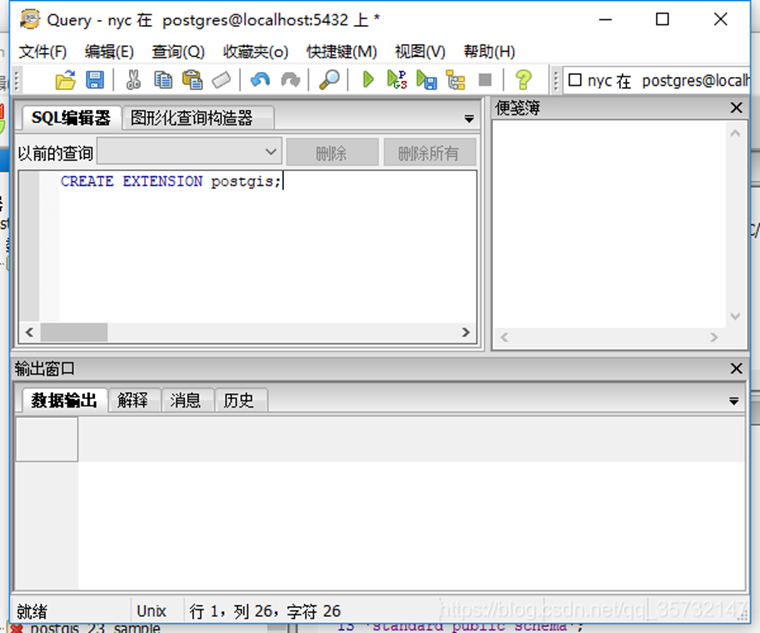
5.在查询文本区域中输入以下查询语句以加载PostGIS****空间扩展:
CREATE EXTENSION postgis;
6.单击工具栏中的执行查询按钮(或按F5)以"执行查询"。
**7.**现在,通过运行PostGIS函数来确认是否安装了PostGIS:
SELECT postgis_full_version();
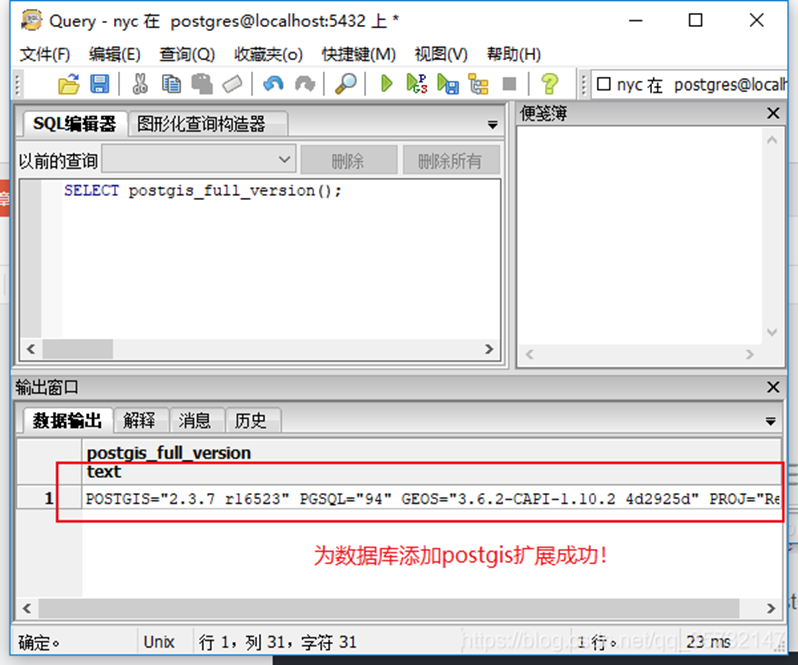
至此,已经成功地创建了PostGIS空间数据库!
四、加载空间数据(记得设置SRID)
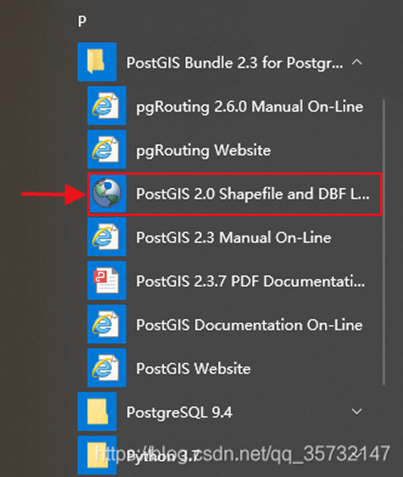
1.首先,返回到选项板,并单击PostGIS部分中的PostGIS shapefile工具,PostGIS shapefile工具将启动。
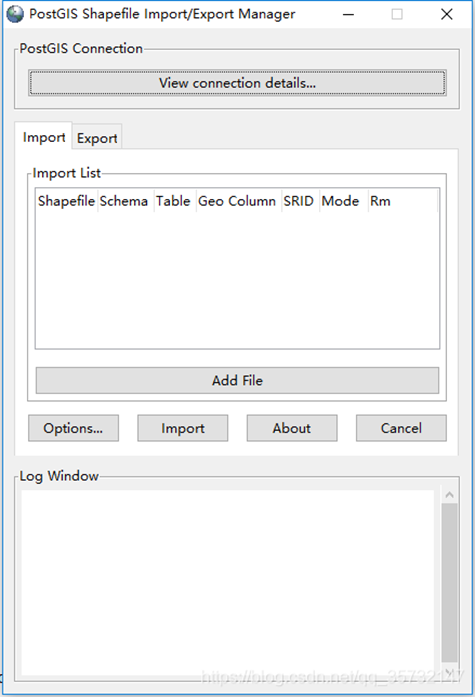
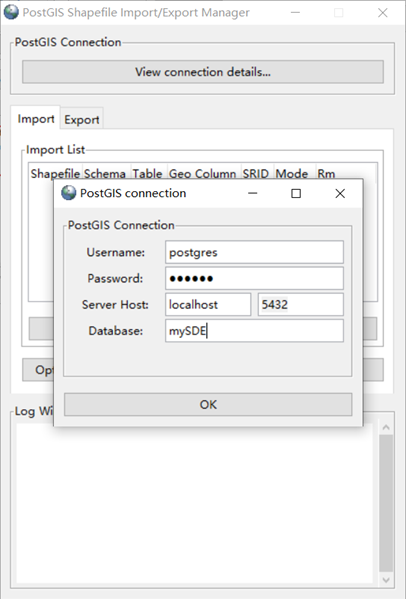
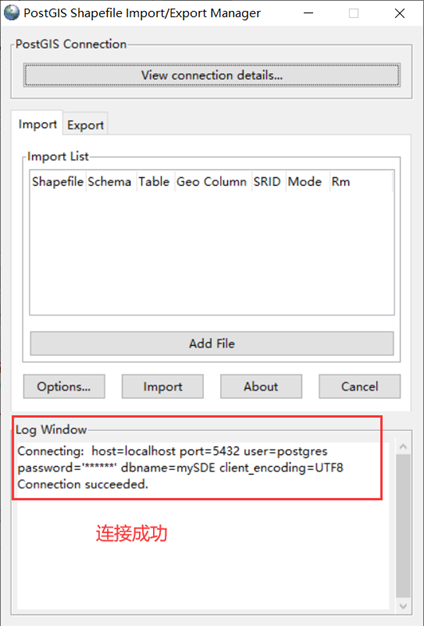
**2.**填写PostGIS连接部分的连接详细信息,然后单击“ok”按钮。程序将测试连接并在日志窗口中报告。
如果安装时使用默认的信息,就如下所示:
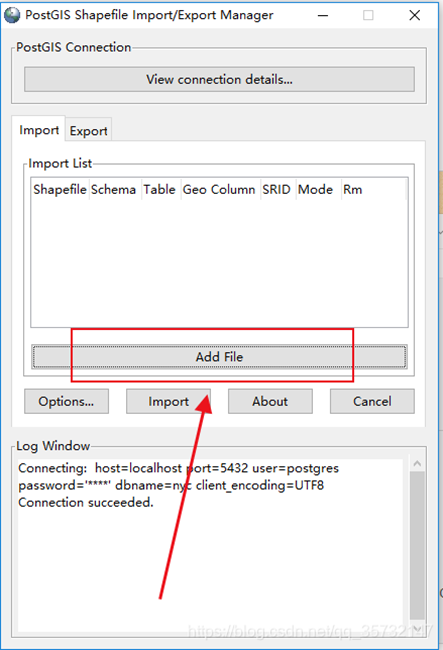
**3.**接下来,打开“Add File”按钮并导航到数据目录文件

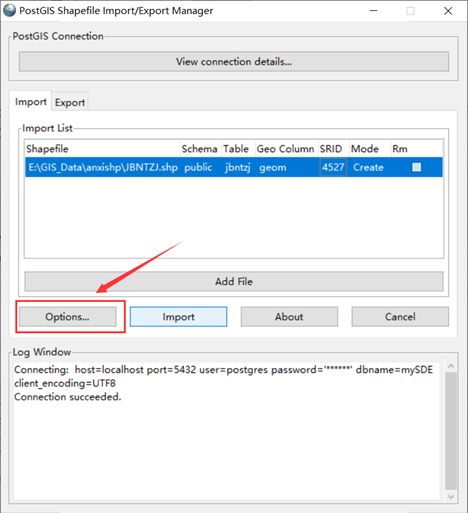
4.将文件的SRID(空间参考信息)值更改为4527(数据源的空间参考信息)。请注意,架构、表名和列名已经根据shapefile文件里的信息填充。

5.单击"Options“按钮查看加载选项。加载程序将使用快速“COPY(复制)“模式,并在加载数据后默认创建空间索引。

**6.**最后,单击”Import“按钮并观察导入过程。
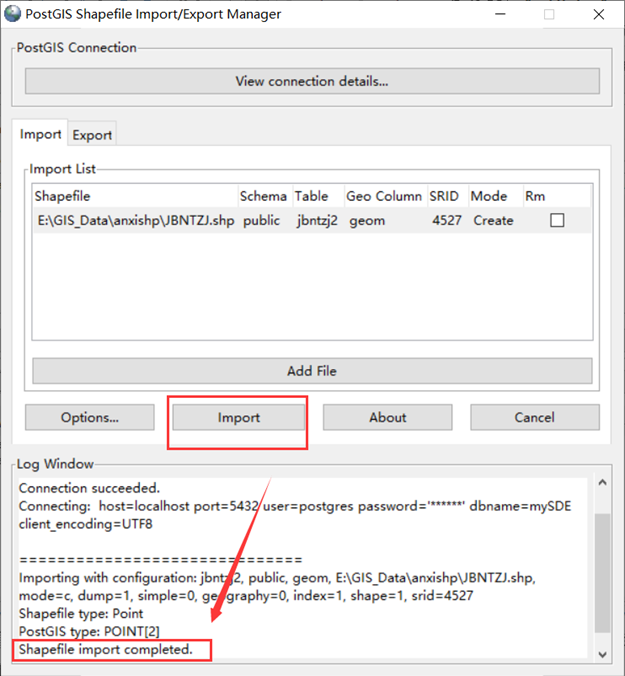
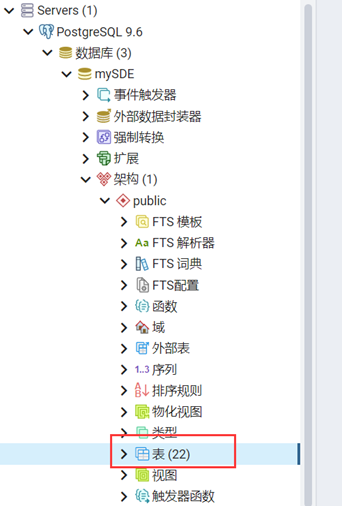
**7.**加载所有文件后,打开pgAdmin可以看到表已加载到数据库中:数据库>mySDE>架构>public>数据表里。
五、GeoServer连接PostGIS
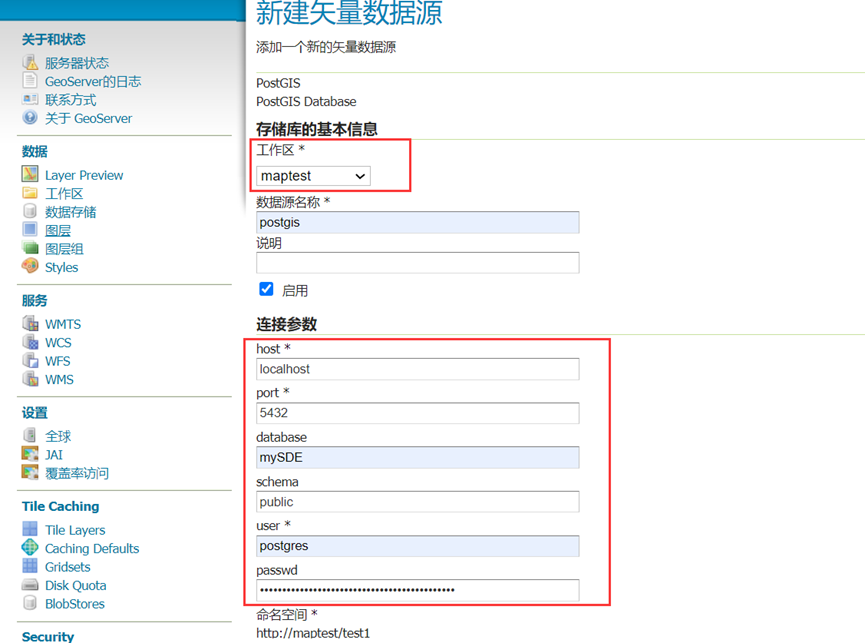
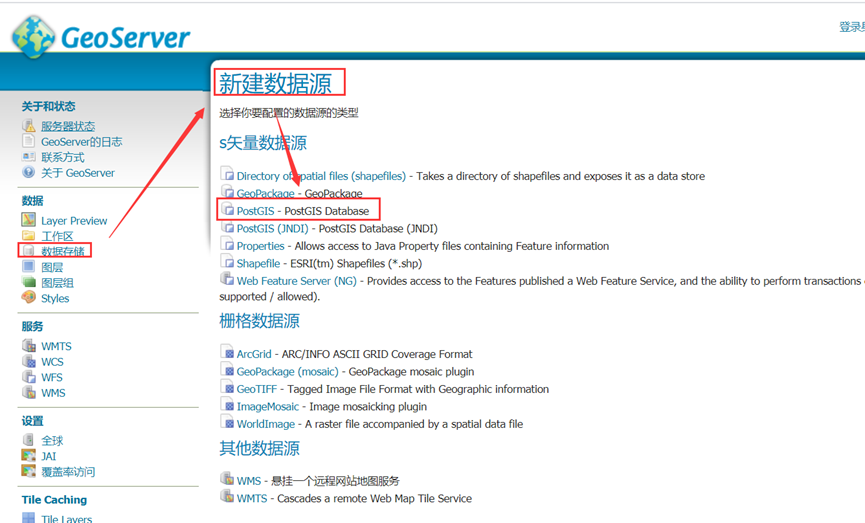
1.打开GeoServer,点击数据存储中的新建数据源,选择PostGIS
2.选择工作区,连接参数中输入PostgreSQL端口号、数据库、用户名、密码,最后点击保存应用
六、mapbox加载geoserver发布的瓦片服务
|
|
注意
EPSG要设置为3857而不是4326,不然会出现跨域问题